

|
|
Why is my “Blank Document” not blank?Sometimes when you start Word or create a new document, the new document has incorrect formatting or settings or has the text of an old document in it. Why it’s happeningAll documents in Word are based on templates. A template is a special kind of Word file with the .dot, .dotx, or .dotm file extension (instead of .doc or .docx, which are used for documents). The template can contain text (such as a letterhead), special styles (such as those that might be suitable for an academic paper or a newsletter), and custom toolbars (or a customized Ribbon), macros, and shortcut key assignments that make it easier to prepare a certain kind of document. (See also “What Do Templates and Add-ins Store?”) The blank document that you start with when you open Word (“Document1”) and all documents that you create by pressing the New button on the Standard toolbar (Word 2003 and earlier) or choosing “Blank Document” in the New or Templates dialog or on the File | New tab (Word 2010 and above) or by pressing Ctrl+N are based on the Normal template (Normal.dot in Word 2003 and earlier; Normal.dotm in Word 2007 and above), which is the “global” template that also (by default) stores most of your customizations, such as changes to styles or toolbars. If you change a style in the Normal template (for example, if you change the default font, paragraph spacing, margins, or page size, that change affects every blank document you create from then on. Needless to say, if you save text in Normal.dot, that text will appear in every blank document you create, and in most cases this is not recommended. It is a mystery how users manage to save text in the Normal template inadvertently, but if your “blank” documents suddenly start opening with the text of an old document in them, this is what you have done! There are basically two ways to solve this problem: you can delete the extraneous text, or you can force Word to generate a fresh, factory-default copy of the Normal template. This article tells how to do both and also explains how to preview the results of the latter.
The simplest fix: cleaning up the Normal templateIn order to delete the extraneous text from the Normal template, you must first locate the template file and open it. There are numerous ways to locate the Normal template in various versions of Word and Windows; a rundown on the location of this template is given in Charles Kenyon’s article “Normal Template in Microsoft Word – How to Open or Find the Normal Template.” For our purposes, a single simple method will suffice.
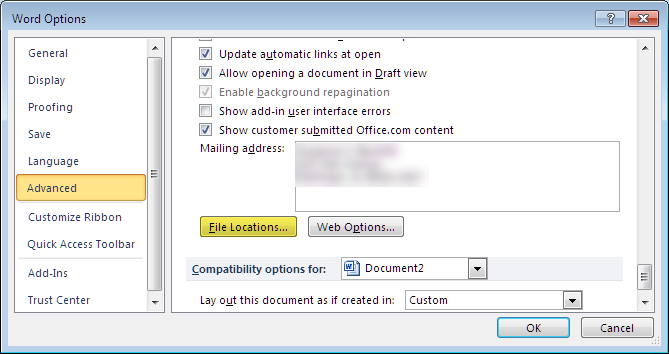
Creating a new Normal template from scratchIf you think you may not be able to return the Normal template to its original state – that is, if you think that, in addition to extraneous text, there may be modifications of margins or styles and you’re not sure how to put these back the way they were – you may want to start over with a new Normal just the way it came out of the box. Especially if you have not been using Word very long or haven’t customized it much, this may be the preferable alternative. If Word does not find the Normal template at startup, it will create a new one. You could assure this by deleting the file, but it is usually better just to rename it. Finding the Normal templateIn order to rename the Normal template, you will have to actually find it first. Its location will vary depending on your version of Word and Windows, but it will always be in the folder where your user templates are stored. There are several ways to find that location, but Method 3 is by far the simplest. Method 1: ResearchAs stated above, the Normal template will always be in the folder designated for “User templates.” The path to this folder is shown in Word’s File Locations dialog. Access that dialog as follows:
The File Locations... button in Advanced Options in Word 2010 In none of those locations will you be able to see the complete file path.
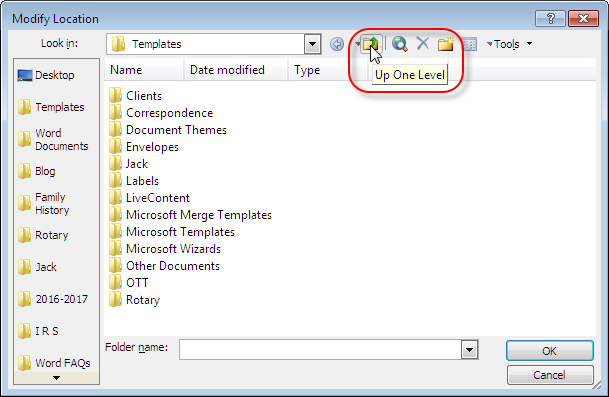
The File Locations dialog in Word 2010 In order to see it, select “User templates” and click Modify… You’ll get this dialog:
The Modify Location dialog in Word 2010
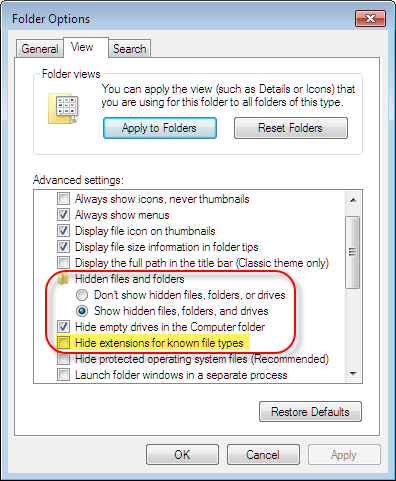
Method 2: SearchUsing Windows Search, search for “Normal.dot” (Word 2003 and earlier) or “Normal.dotm” (Word 2007 and above). For success, you must have first told Windows to “Show hidden files, folders, and drives” since the location is a hidden folder in many recent versions of Word. For instructions, see this Microsoft article.
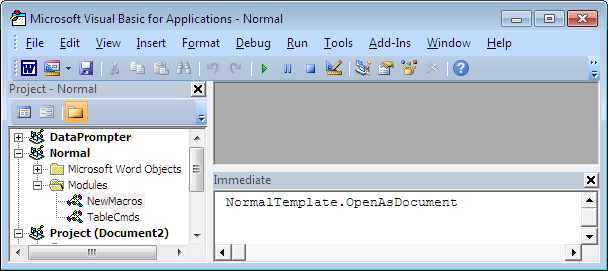
View tab of Folder Options dialog in Windows 7 In addition, if you are not already displaying file extensions, you should opt to do so (that is, clear the check box for “Hide extensions for known file types,” which is right under the one for “Show hidden files and folders”). Method 3: The VBA EditorNo one could blame you if you think both of the above methods are way too much trouble. But there is a much simpler way, and it is very similar to the simple method of opening the Normal template described above:
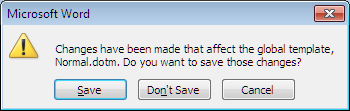
Renaming the fileOnce you have located the template in Windows Explorer (File Explorer, My Computer), making sure that Word is closed, change the filename from Normal.dot or Normal.dotm (or just Normal if you don’t have file extensions displayed) to Normal.old or OldNormal. Then restart Word. You will find that your Document1 and subsequent Blank Documents will be blank again. During this session, Word uses its built-in defaults and does not actually create a new Normal template until you exit the application, at which point you will receive this prompt:
Word 2010 prompt to save the Normal template You must choose Save to save the new Normal template. Salvaging your customizationsBefore you decide to rename the Normal template, you should be aware of what you may be losing by doing this. All templates can store a variety of customizations, and if you haven’t explicitly chosen to store them elsewhere, those customizations will be stored in the Normal template. For a complete rundown on these, see “What Do Templates and Add-ins Store?” Even if you haven’t heavily customized Word, you may have added some toolbar buttons or created AutoText. In addition to toolbar customizations and AutoText entries, templates store macros, keyboard shortcuts, styles, and custom toolbars. Some of these can be copied from one template to another; some can’t. What you can salvage easily
When you start the Organizer, its two windows will display the Normal template on the right and the current document on the left. In order to copy items from your renamed Normal template to the new one, you must use Close File to close the current document, then use Open File to open the renamed template. Fortunately, Word will automatically open the default templates folder, but the Open dialog will display only “Document Templates” (that is, files with a .dot, .dotx, or .dotm file extension); if you have given your renamed template a different extension (such as Normal.old), you will need to display “All Files” in order to see it. Once you have opened it, you can select a style, macro, or (in earlier versions) AutoText entry or toolbar on the left side and click Copy to copy it to the Normal template on the right. What you can salvage, but not so easily
A trial runOnly you can decide whether you have too much to lose by renaming the Normal template and starting over. But you can get a preview of what Word will be like with a new Normal by starting Word in a special way. There are actually two special ways, and their results are different depending on the Word version. Office Safe ModeIn Word 2002 and above you can access what is called Office Safe Mode by holding down the Ctrl key while you start Word. You will be asked whether you want to start Word in safe mode; say yes. The article “Description of Office Safe Mode for Word 2003 and Word 2002” provides more information on this mode and also explains another way to launch it, using the command-line switch /safe. In Word 2002 and 2003, this way of starting Word loads it without the Normal template, add-ins, and user customizations of all kinds, including Registry settings (such as those selected in Word’s Options). The behavior of Safe Mode in Word 2007 and above is a little different from in earlier versions: Word starts without a document, and pretty much everything is disabled. This is because settings stored not only in the Normal template but also in .qat or .ui files, the Registry, Building Blocks files, etc., are suppressed. For that reason, using the /a startup switch (described below) rather than Safe Mode is recommended for these versions. Startup switchIn any version of Word, you can use the /a switch to start Word without loading the Normal template. You can read more about startup switches in the Help topic “How to use startup command-line switches to start Word 2010, Word 2007, Word 2003, Word 2002, and Word 2000.” To start Word this way:
In Word 2003 and earlier, this method will start Word without any templates or add‑ins (and with the default Normal.dot that is coded into the application), but it does load user-customized Registry (Options) settings. In Word 2007 and above, in which AutoText entries and customizations of the Ribbon and Quick Access Toolbar are not stored in Normal.dotm, starting Word this way instead of using Office Safe Mode actually gives you a more accurate preview of what you will lose by renaming Normal.dotm. This article copyright © 2001, 2017, 2023 by Suzanne S. Barnhill. I am indebted to fellow Word MVP Jay Freedman for a number of suggestions that greatly improved this article. |